
The complete guide
Adjustable Deck Pedestals, A Practical Buyer's Guide
The problem with flat ground that is not flat
Anyone who has set out a deck frame knows the feeling. You measure, you square it up, you drop it onto the ground, and one corner floats two centimetres in the air. Lawns slope. Old slabs have a fall built in for drainage. Crusher dust settles unevenly after rain. Even a surface that looks level to the eye will usually be out by enough to make the finished deck rock.
The old fix was packers. Bits of treated pine, broken pavers, folded damp-proof course, whatever was lying around. They work for a while. Then the timber rots, the pavers crack, the packers slip, and you are back under the deck with a crowbar wondering how it all got so sloppy.
Adjustable deck pedestals replace guesswork with a dial. Each support winds up or down to its own height, so the joist above it sits exactly where you want it. Set it once, check it with a level, and move on.
How these pedestals work
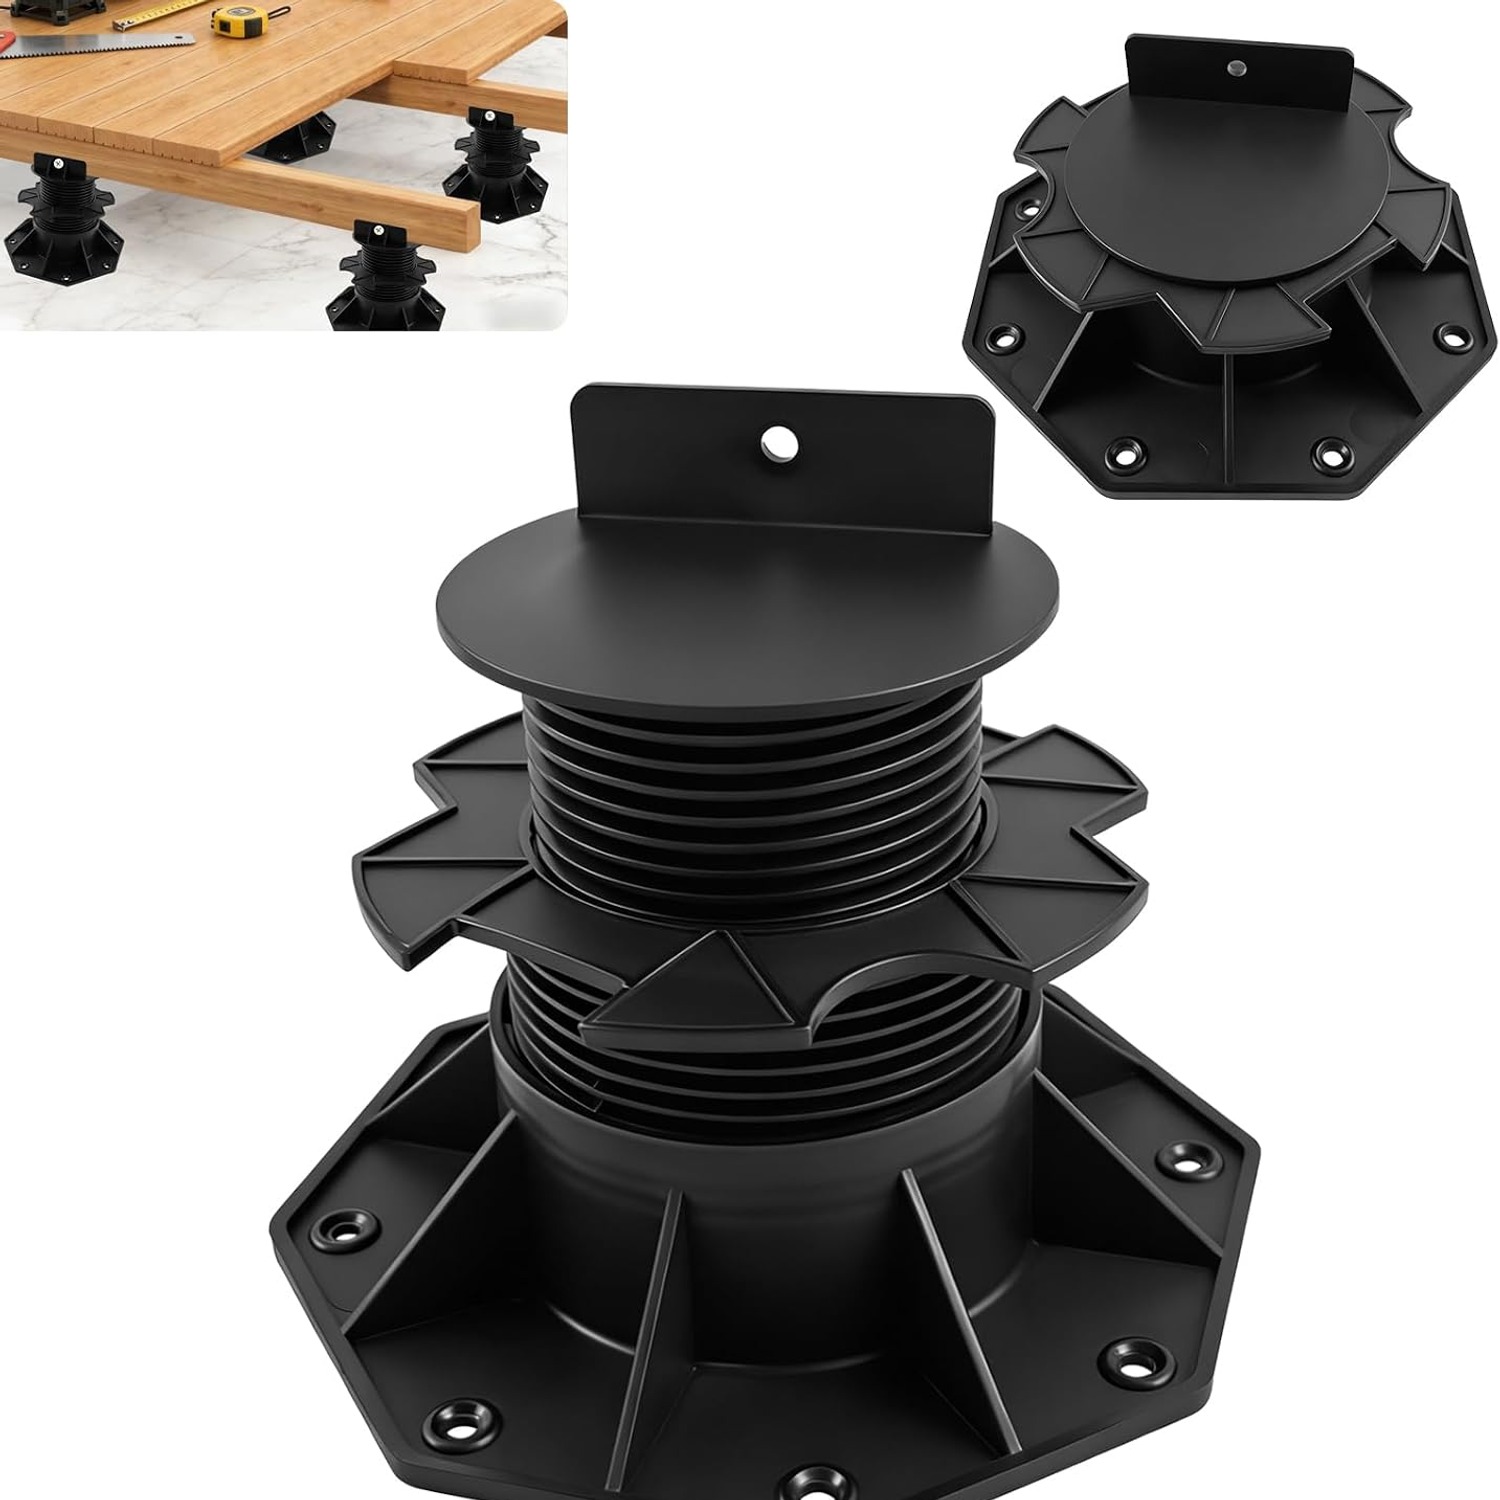
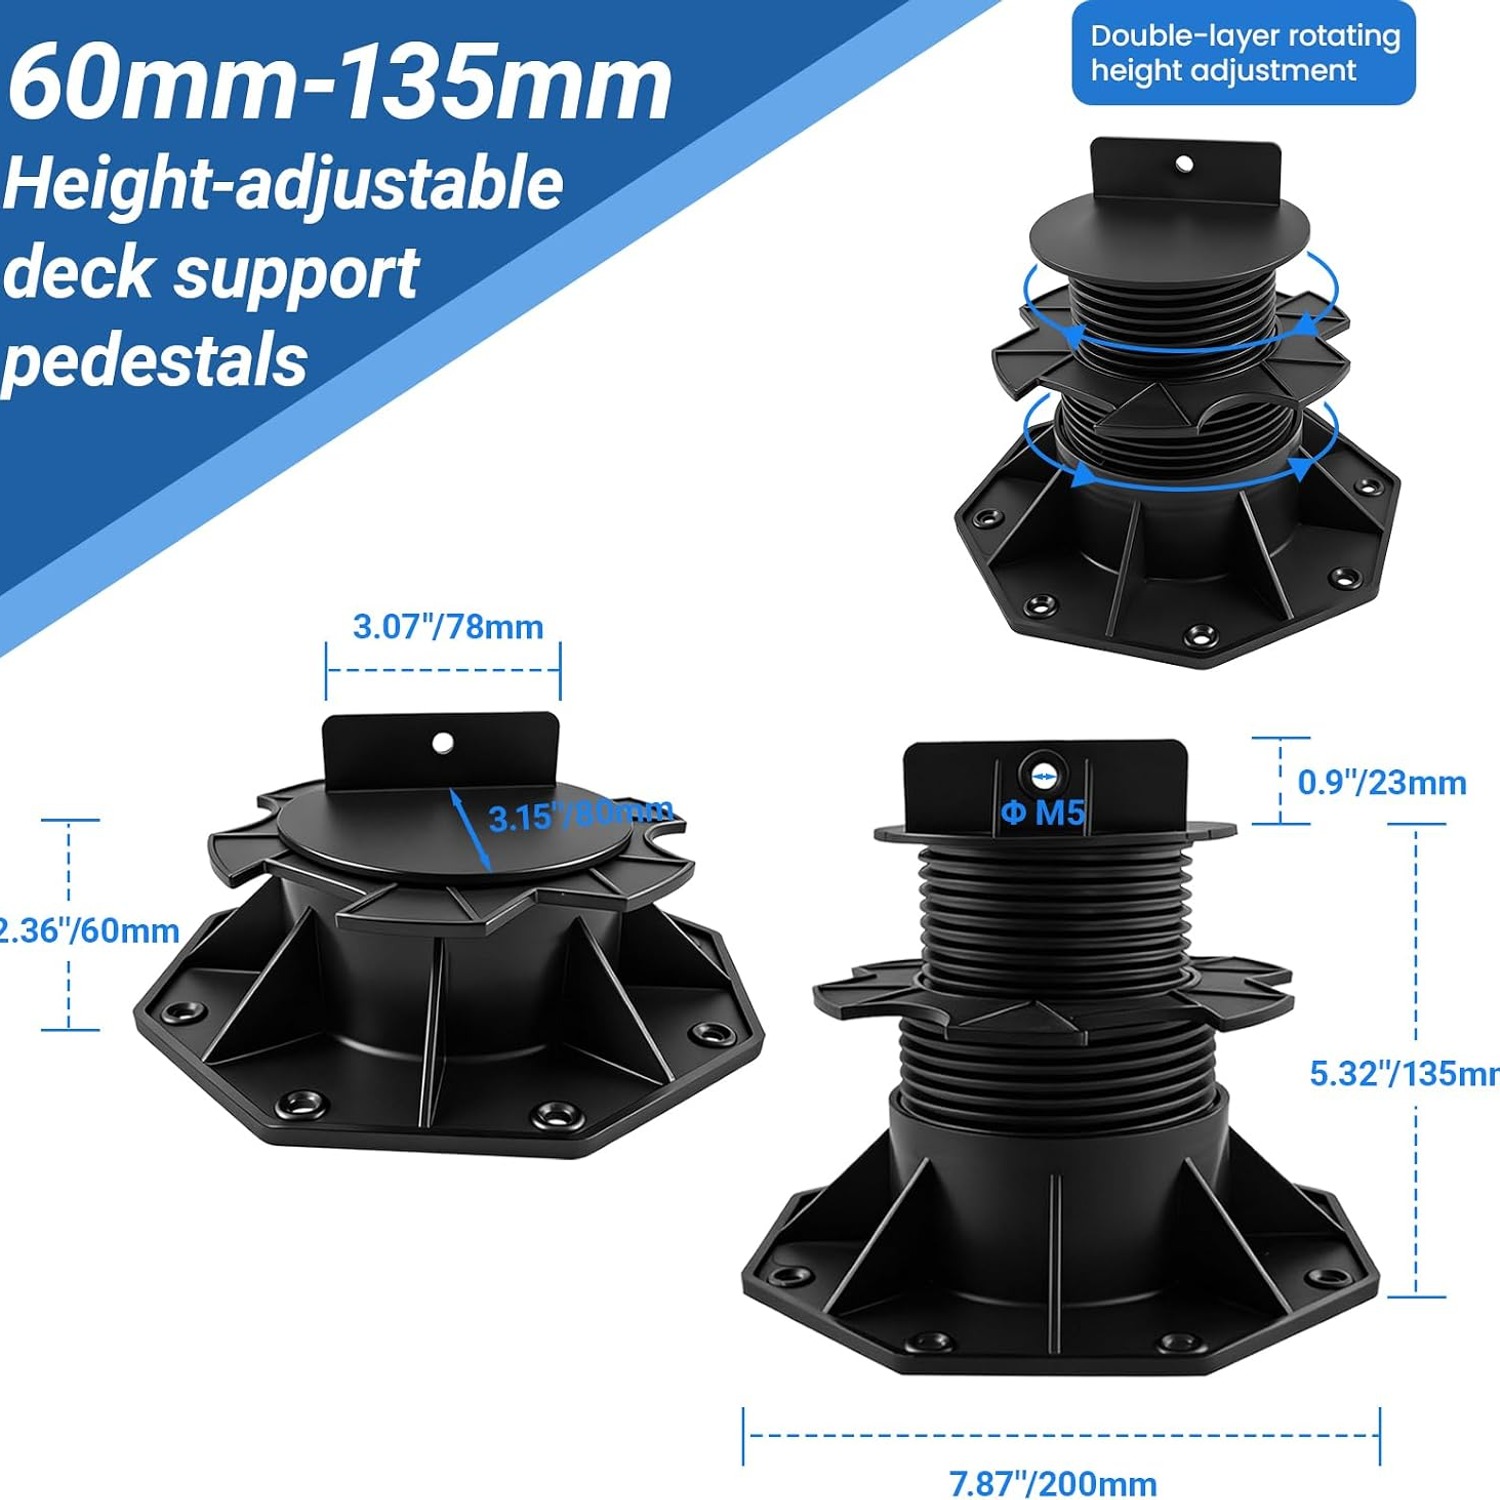
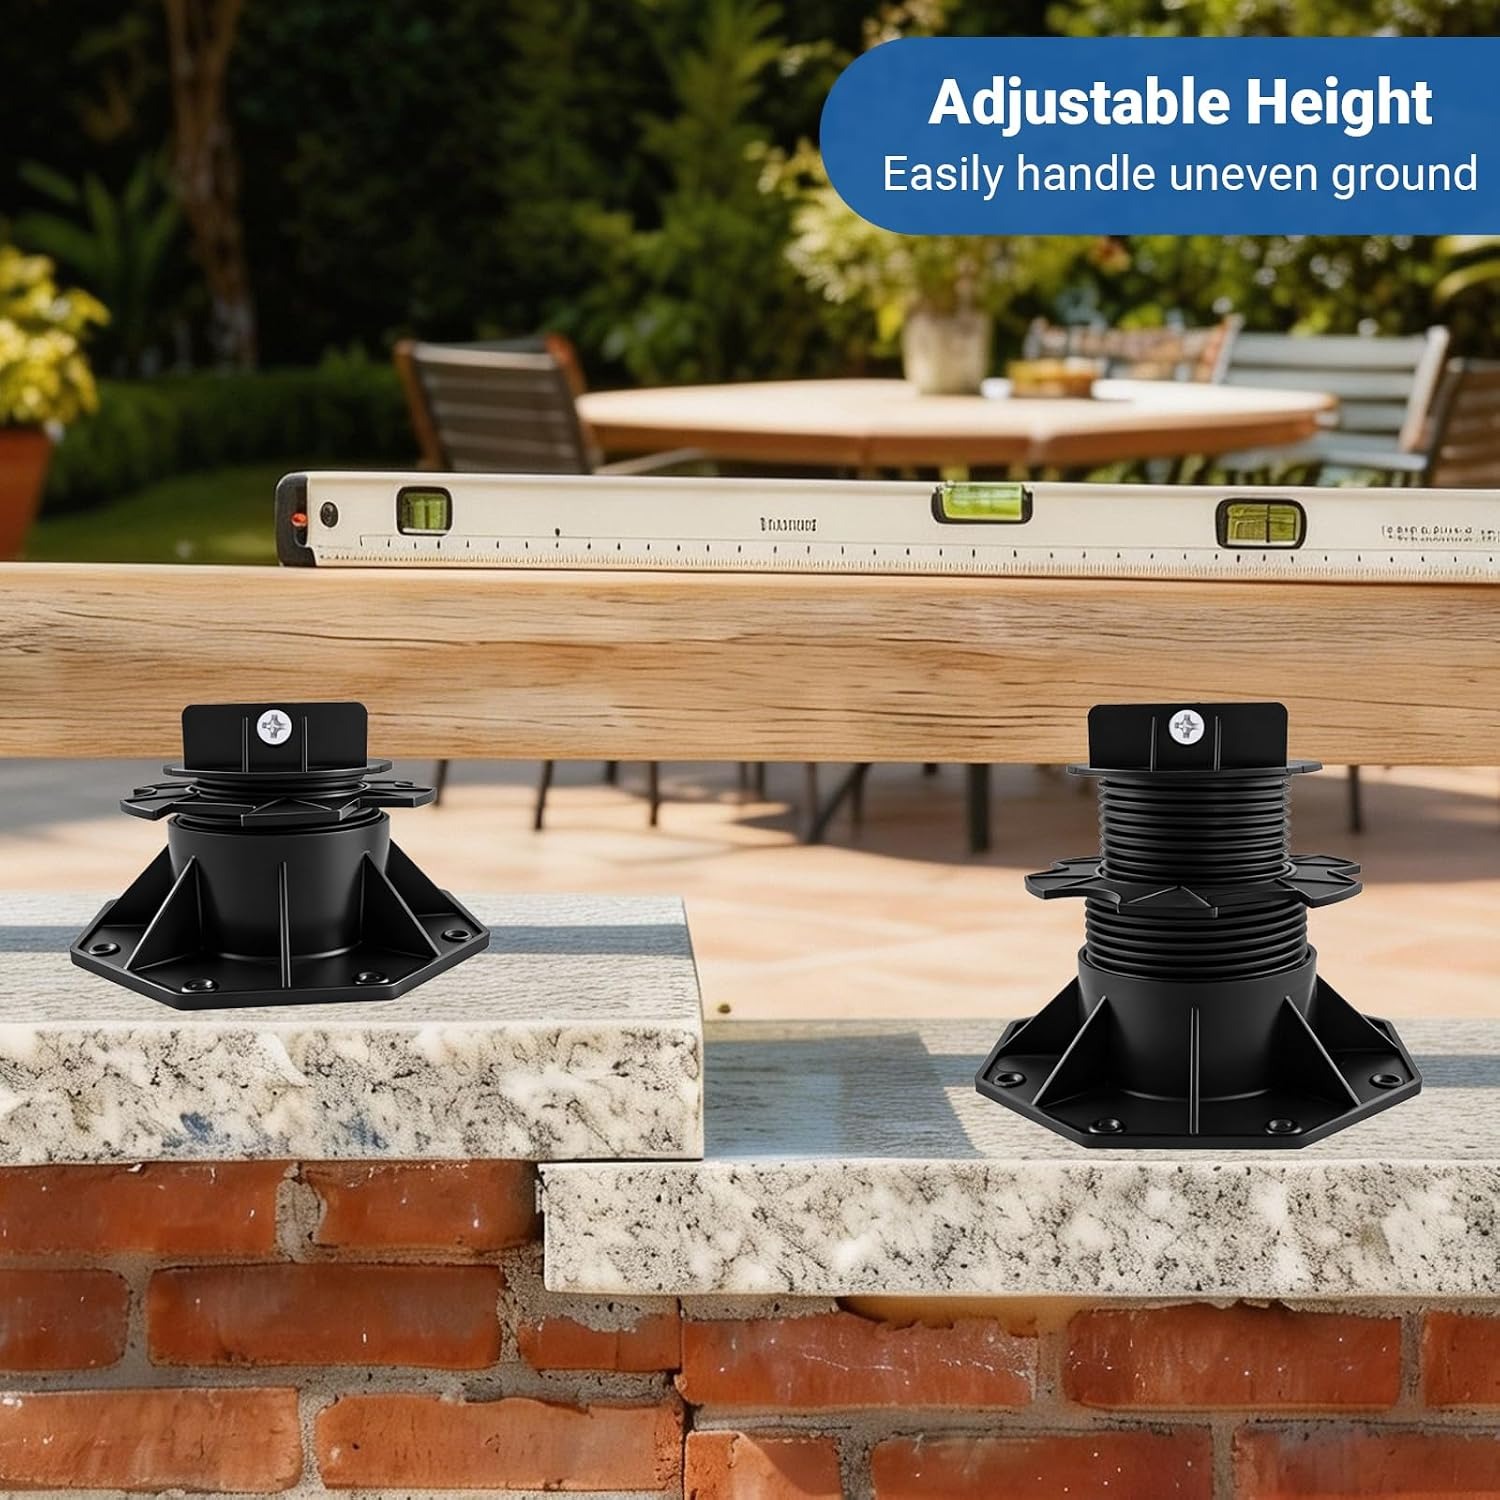
The design is simple on purpose. A broad base sits on the ground or slab. Above it, a threaded column screws in and out to change the overall height, in this case anywhere from 60mm to 135mm. On top sits a plate with small screw holes, which you fix to the underside of your joist with outdoor screws.
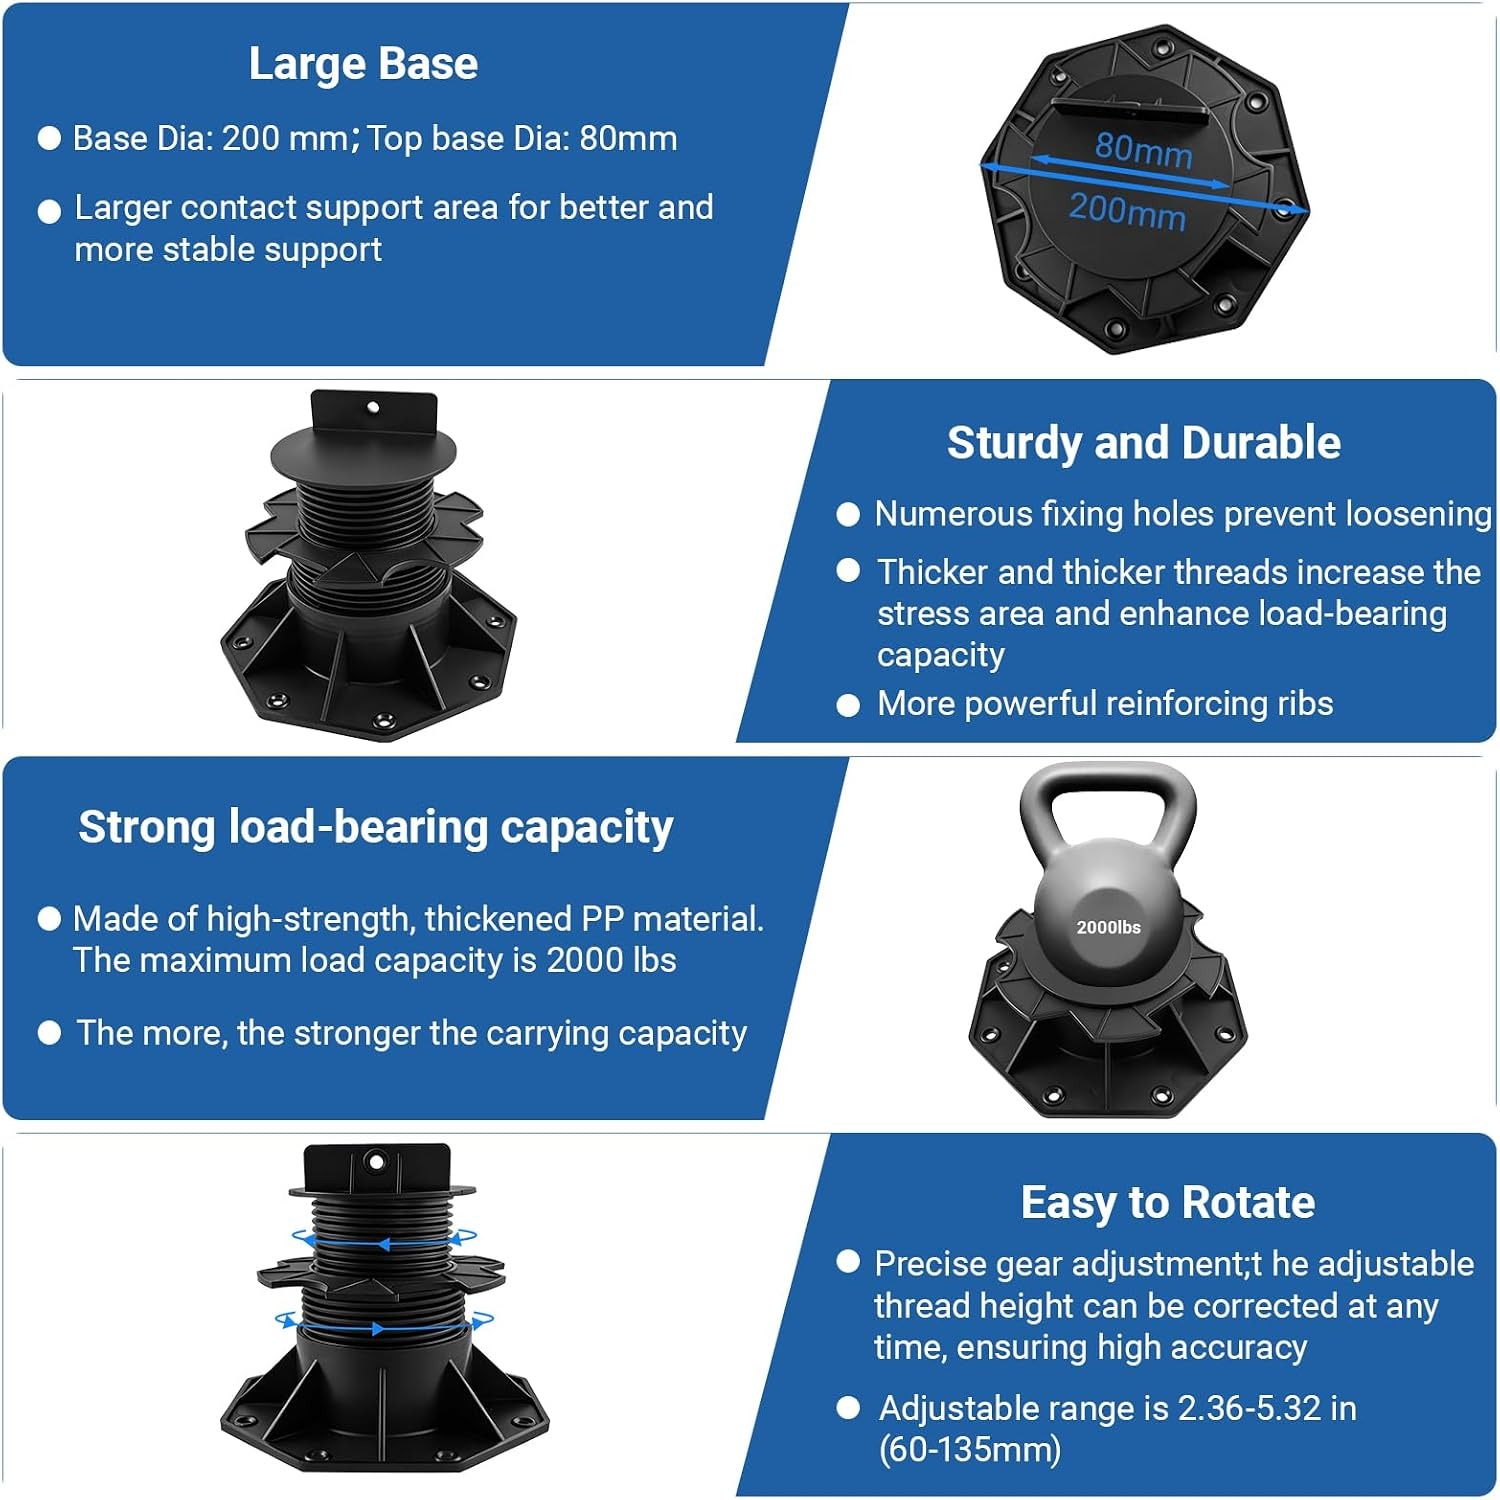
That rounded base matters more than it looks. A wider footprint spreads the load over more ground, which is what stops a support slowly pushing into soft soil. The maker notes the base design helps the deck resist swaying and tilting, and in practice the difference between a firm deck and a bouncy one is usually how well the load is spread at the bottom.
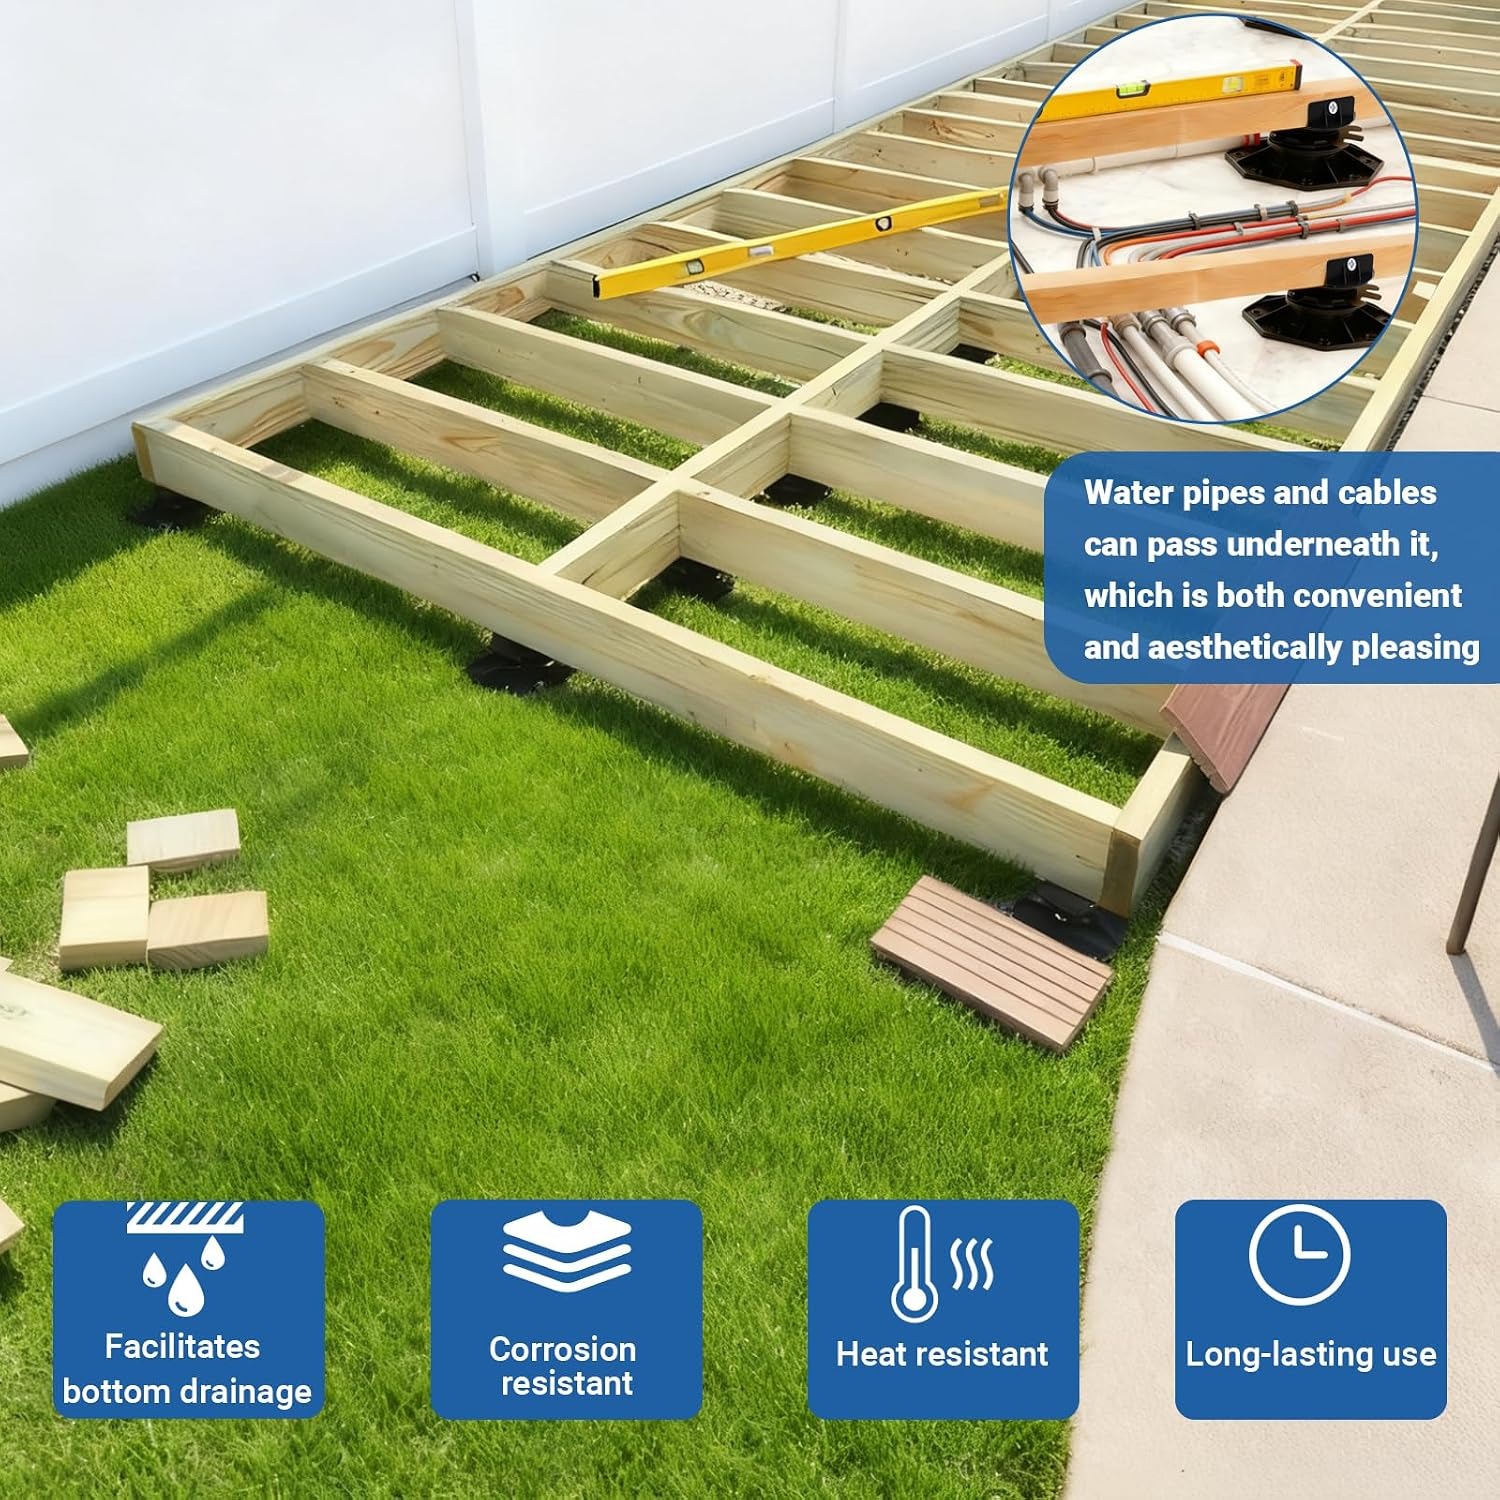
The column is moulded from high-strength PP. That is a plastic chosen for outdoor work because it does not rust, does not rot, and keeps its shape through sun, rain and frost. In a country where a deck can sit at fifty degrees in the sun one week and under a storm the next, that stability is the whole point. Steel feet rust. Timber blocks rot and attract termites. Plastic just sits there.
Good deck support blocks let you fix a mistake later. These do. If a pedestal settles after the first wet season, lift a board, reach the collar, and turn it until the joist comes back to level.
Who this set suits
Twelve pedestals with a 60mm to 135mm range covers a specific kind of job, and it is worth being honest about which jobs those are.
They suit low floating decks, the sort you build on a lawn or over an existing slab without digging post holes. They suit landings, platform steps and short raised walkways through a garden. They suit shed and greenhouse floors, where lifting the bearers clear of the dirt is the difference between a floor that lasts and one that goes soft in five years. They also work under runs of pipework that need to sit off the ground with a consistent fall.
What they are not is a post system. If you need to stand a deck a metre off the ground, or you are building over a steep drop, you need stirrups, posts and proper footings, and probably a conversation with a builder. These pedestals live in the low-level world, and they do that job well.
Working out how many you need
This is where people under-order. Twelve sounds like a lot until you draw the frame.
Start with your joist spacing, which for most timber decking is 450mm centres and for many composite boards is 300mm or 400mm. Check what your board manufacturer specifies, because composite in full Australian sun needs closer support than people expect. Then work out your bearer or joist support spacing along each run. A support point every 600mm to 900mm along a bearer is a common starting figure, but your framing plan should drive it.
Multiply the rows by the points per row, add a couple of spares, and that is your number. A three metre by two metre platform will often need more than one pack. Ordering them together keeps the batch consistent and saves a second delivery wait.
Getting the base right
The pedestal is only as good as what it sits on. This is the part that separates a deck that stays level from one that sinks in a corner.
On an existing concrete slab you are already sorted. Sweep it clean, place the pedestals and wind them to height. The slab takes the load and nothing moves.
On soil or lawn, do some groundwork first. Scrape back the turf, compact the surface, and set a flat paver under each pedestal. A 300mm square concrete paver is cheap and does a remarkable amount of work spreading load. On soft or reactive clay, go bigger or compact a bed of road base first. Skipping this step is the single most common reason low decks end up uneven after a year.
Also think about water. Make sure the ground under the deck drains away from the house, not towards it. One of the quiet benefits of a pedestal system is the gap it creates, which lets water run and air move under the boards. That airflow keeps the underside of your joists drier, and dry timber lasts.
Setting them level
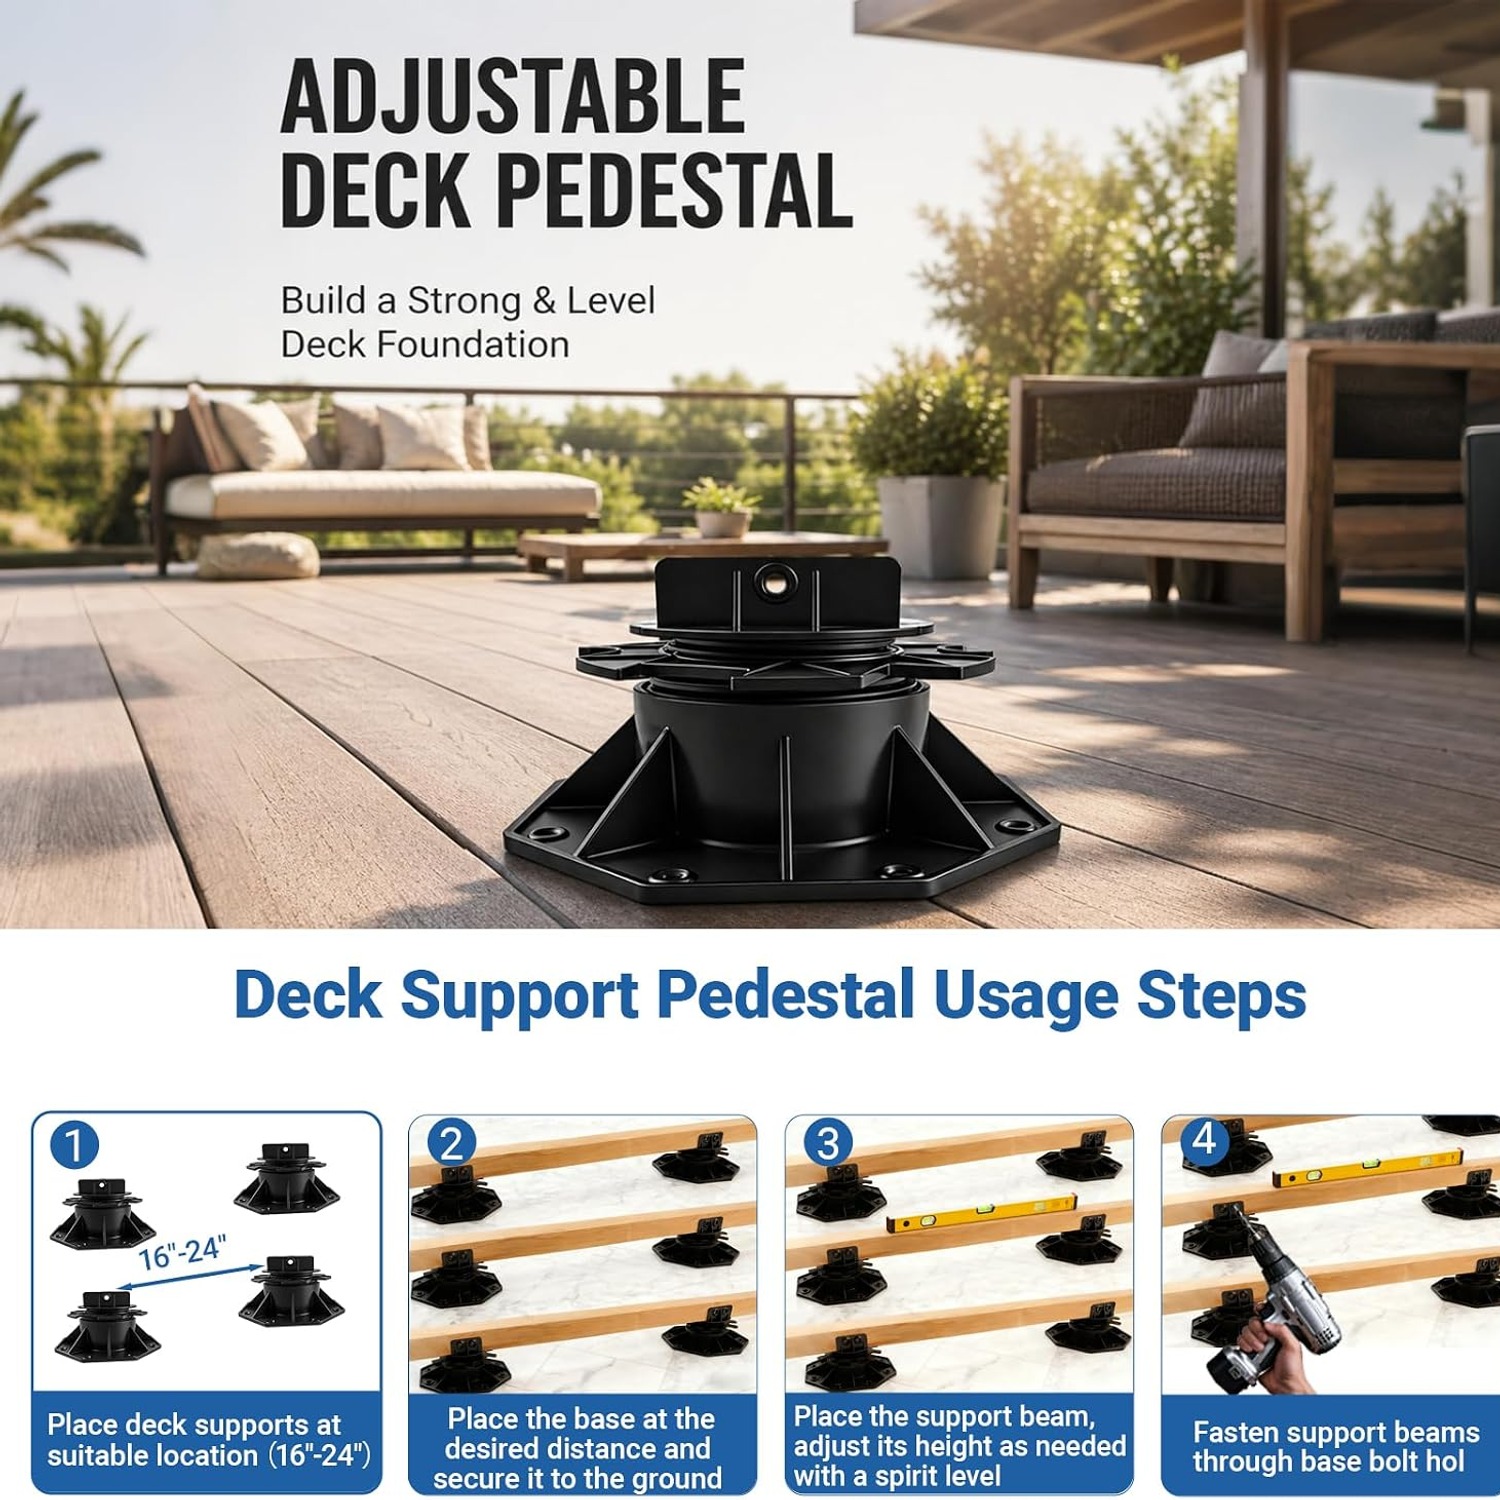
Get your frame built and squared first, then bring the pedestals in. Find the highest point of the ground under the deck footprint, because that point sets your minimum height. Place the first pedestal there and wind it to roughly the lower end of its range.
Run a string line or lay a long straight edge with a spirit level across the frame from that first point. Work outward, placing a pedestal at each bearing point and winding until the joist just touches the line. Do not force it. The joist should rest on the pedestal, not be lifted off its neighbours.
Once every support is in, walk the deck and feel for any softness. A point that does not carry weight needs a quarter turn up. Then fix the top plates to the joists with outdoor-rated screws, stainless or hot-dip galvanised if you are anywhere near the coast. Screws are not supplied, so pick them up with the timber.
Recheck everything after the first heavy rain. Ground settles. That is normal, and fixing it takes two minutes with these supports instead of an afternoon with a crowbar.
Looking after them
There is not much to do. Twice a year, clear leaves and soil from around the bases so water keeps draining freely. If mud builds up, a rinse with plain water is enough. Avoid solvents and harsh chemical cleaners on the plastic.
After the first wet season, drop down and check your levels. If one corner has moved, adjust it. After that, most people only look again if they notice a bounce or a new squeak. The supports themselves need no painting, oiling or sealing.
The short version
If you are building something low, something flat, and something that has to sit on ground that is anything but flat, adjustable deck pedestals are the sensible answer. This twelve pack covers heights from 60mm to 135mm, fixes to timber or composite joists with a few screws, and lets you re-level later when the ground does what ground does.
Put a paver under each one, set them with a string line, and check them after the first big rain. Do that and you will have a deck that stays true for years, with none of the concrete, post holes or curing time the old method demanded.